Domain Name Riches: Countries Cashing In on Top-Level Domain Names

country top level domains

In the digital age, even the smallest of countries can strike it rich. While beaches and mountains might be the traditional tourist attractions, there’s a new gold rush happening online: domain names. Countries around the world are capitalizing on the unique power of web addresses to generate significant revenue.

A Big Winner: Anguilla for the .ai – i.e. Artificial Intelligence

One of the most notable examples is Anguilla, a tiny Caribbean island. Thanks to the booming artificial intelligence industry, their .ai domain name has become highly sought after. Businesses and individuals looking to associate themselves with AI are flocking to register websites ending in “.ai,” driving up the value of this digital asset.

Tuvalu for .tv

But Anguilla isn’t the only country cashing in on domain name gold. Tuvalu, a remote Pacific island chain, has turned their .tv domain into a lucrative venture. Originally intended for television-related websites, the .tv domain has found broader appeal, especially among online streaming platforms and gaming communities.

Libya for .ly and “domain hacks”

Libya, a North African nation, has also discovered a unique advantage in their .ly domain. These addresses, often referred to as “domain hacks,” are popular among businesses and individuals looking for memorable and catchy website names.

Montenegro and the .me domain

Montenegro, a Balkan country, has capitalized on the personal branding trend with their .me domain. Websites ending in “.me” are perfect for individuals and businesses looking to create a strong online presence and establish a personal connection with their audience.

Columbia and .co

Colombia, a South American country, has also found a niche with their .co domain. While primarily used by Colombian businesses, the .co domain has gained popularity among individuals and companies looking for a unique and memorable web address.

British Indian Ocean Territory and .io for tech

The .io domain, representing the British Indian Ocean Territory, has become a popular choice among tech startups and online services. Its association with innovation and modernity has made it a desirable option for businesses seeking a unique and memorable online presence. While not as widely recognized as some other ccTLDs, .io has gained significant traction in recent years, demonstrating its potential to become a prominent domain extension in the digital landscape.

As the internet continues to evolve, the value of domain names will only increase. Countries that have strategically leveraged their top-level domains have demonstrated the potential for significant economic benefits. So, the next time you browse the web, remember that behind those familiar-looking website addresses, there might be a country cashing in on the digital gold rush.

What are “Domain Hacks”?

Domain hacks are a clever way to use domain names to incorporate relevant keywords or acronyms. For example, “ly” in “.ly” can represent “lyrics,” “lovely,” “lifestyle,” or other words that align with the business or individual’s brand.

In the context of Libya, the “.ly” domain extension offers a unique advantage due to its versatility. It can be used to create memorable and catchy website names that are directly related to the business or individual’s focus.

Here are some examples of how “.ly” domain hacks might be used:

  • Music-related businesses: A music streaming service could use “musicly.ly” or “lyricly.ly”.
  • Lifestyle brands: A fashion brand might use “stylely.ly” or “lovely.ly”.
  • Personal branding: An individual could use their name followed by “.ly” to create a personal website or blog.

By incorporating relevant keywords into their domain names, businesses and individuals can improve their online visibility and attract more targeted traffic. The “.ly” domain extension offers a creative and effective way to achieve this goal.

Why is .co popular when there is .com? Seems like you could miss traffic because of typos

The popularity of the .co domain extension can be attributed to several factors:

  1. Availability: Many desirable .com domain names are already taken. .co offers a viable alternative for businesses looking for short, memorable, and brandable domain names.
  2. Country Code Top-Level Domain (ccTLD) Association: While .co is the ccTLD for Colombia, it has also gained popularity as a generic top-level domain (gTLD). This means it can be used by businesses from any country, making it more accessible.
  3. Brandability: .co domains can be easily incorporated into company names or slogans, enhancing brand recognition. For example, “GoPro.co” or “Spotify.co” sound catchy and memorable.
  4. SEO Benefits: While not a direct ranking factor, using a relevant .co domain can sometimes provide a slight SEO advantage, especially in regions where the .co extension is more recognized.
  5. Trendiness: The .co extension has gained popularity in recent years, especially among tech startups and online businesses. This trend has helped to increase its desirability.

While it’s true that you might miss some traffic by not using a .com domain, the benefits of using a .co domain can outweigh the potential drawbacks for many businesses. The key is to choose a domain that is relevant, memorable, and aligns with your brand.

Related: What is Domain Squatting and how to protect your domain name?

Hyphen or No Hyphen? The Domain Name Dilemma

How many syllables and how many words should a domain name contain to make sure it is easy to remember and user friendly?

.com vs .us, .com vs .uk…..com vs Country Code Top-Level Domains (ccTLDs): Which domain extension should you choose?

Is a .com domain better for SEO?

Why are all of the best domain names taken when there aren’t websites using them?

Why Are .io Domain Names So Expensive? Are They Worth the Hype?

Are you ready to design & build your own website? Learn more about UltimateWB! We also offer web design packages if you would like your website designed and built for you.

Got a techy/website question? Whether it’s about UltimateWB or another website builder, web hosting, or other aspects of websites, just send in your question in the “Ask David!” form. We will email you when the answer is posted on the UltimateWB “Ask David!” section.

Posted in Ask David!, Domain Names | Tagged , , , , , , , , , , , , , , , , , , , , , , , , | Leave a comment

Should You Host Google Fonts Directly on Your Website?

web fonts

A Closer Look at Performance and Security

When it comes to incorporating fonts into your website, Google Fonts is a popular choice. It offers a vast library of free, high-quality fonts that can enhance the visual appeal of your site. However, there’s a common question among web developers: Is it better to host Google Fonts directly on your website, or should you link to them externally? Let’s explore the pros and cons of both approaches.

Hosting Google Fonts Directly

Pros:

  • Improved Performance: By hosting fonts locally, you can reduce the number of HTTP requests your website needs to make. This can lead to faster loading times, especially for users with slower internet connections.
  • Increased Control: You have more control over the fonts and can update them without relying on Google’s servers. This can be beneficial for websites with strict branding guidelines or those that need to maintain a consistent look and feel.
  • Offline Accessibility: If your website is designed to be available offline, users will still be able to see the fonts correctly, as an internet connection won’t be necessary.

Cons:

  • Increased Website Size: Hosting fonts locally can increase the overall size of your website, which may impact loading times for users with faster internet connections. But actually, this is really just like having another image on your website.
  • Maintenance Overhead: You need to manage font updates and ensure they are compatible with your website.

Linking to Google Fonts Externally

Pros:

  • Reduced Website Size: Linking to Google Fonts externally keeps your website smaller, which can improve loading times for users with faster internet connections. But this is negligible.
  • Easier Maintenance: Google handles font updates, so you don’t need to worry about compatibility issues.
  • CDN Benefits: Google Fonts is served from a Content Delivery Network (CDN), which can improve performance by delivering fonts from a server closer to the user’s location.

Cons:

  • Dependency on Google: If Google Fonts is unavailable or experiences issues, your website’s typography may be affected.
  • Additional HTTP Request: Linking to Google Fonts requires an additional HTTP request, which can slightly impact loading times.

Making the Right Choice

The best approach for your website depends on several factors:

  • Website Size and Performance: If performance is a top priority, hosting fonts locally might be a better option.
  • Branding and Control: If you have strict branding guidelines or need to update fonts frequently, hosting them locally gives you more control.
  • Target Audience: Consider your target audience’s internet speeds. If many of your users have slower connections, hosting fonts locally can improve their experience.

Ultimately, the decision of whether to host Google Fonts directly or link to them externally should be based on a careful evaluation of your website’s specific needs and goals. By understanding the advantages and disadvantages of each approach, you can make an informed choice that optimizes both performance and user experience.

Related: How can I use a Custom Font on my website?

How do I make my website look a bit handmade or like it is my own handwriting?

The Comeback of Maximalism: A Bold New Era for Web Design

Top 10 Mistakes That Make Your Website Look Unprofessional

Are you ready to design & build your own website? Learn more about UltimateWB! We also offer web design packages if you would like your website designed and built for you.

Got a techy/website question? Whether it’s about UltimateWB or another website builder, web hosting, or other aspects of websites, just send in your question in the “Ask David!” form. We will email you when the answer is posted on the UltimateWB “Ask David!” section.

Posted in Ask David!, Website Design | Tagged , , , , , , , , | Leave a comment

Is inline CSS better or using a stylesheet?

CSS - Stylesheets

Short answer: Stylesheet! Reasons: Improved Performance, Enhanced Maintainability, Better Organization, SEO Benefits.

Longer answer…

The Myth of Inline CSS: Why Separate Stylesheets are Superior

Introduction

In the realm of web development, there’s a persistent misconception that inline CSS is the fastest and most efficient way to style web pages. This belief often leads to practices that can actually hinder performance and make code more difficult to maintain. In this article, we’ll debunk the myth of inline CSS and explore the compelling reasons why separate stylesheets are the preferred approach.

The Downsides of Inline CSS

  • Performance Impact: While it might seem counterintuitive, inline CSS can often be slower than external stylesheets. This is because the browser has to parse and apply the CSS for each individual element, rather than loading it once and applying it to multiple elements. This can lead to increased page load times, especially on larger websites with complex styling.
  • Maintainability Challenges: Inline CSS can make your code more difficult to maintain and update. When styles are scattered throughout your HTML, it becomes challenging to make global changes or reuse styles across different pages. This can lead to inconsistencies and errors.
  • Readability Issues: Inline CSS can clutter your HTML, making it harder to read and understand. By separating styles from content, you can improve the overall readability and maintainability of your code.

The Benefits of Separate Stylesheets

  • Improved Performance: External stylesheets can significantly improve page load times. The browser can cache the stylesheet, meaning it only needs to be downloaded once, even if multiple pages use the same styles. This can lead to a faster user experience.
  • Enhanced Maintainability: Separate stylesheets make it easier to manage and update your website’s styling. You can edit the CSS file without affecting the HTML structure, and you can reuse the same styles on multiple pages. This reduces the risk of errors and makes it easier to make global changes.
  • Better Organization: Keeping styles in a separate file helps to organize your code and improve readability. This makes it easier to understand the structure of your website and find the styles you need.
  • SEO Benefits: Search engines can crawl and index external stylesheets more efficiently than inline styles. This can improve your website’s search engine rankings.

In Summary

While inline CSS might seem like a quick fix for styling your web pages, it’s often a suboptimal choice. Separate stylesheets offer a number of advantages, including improved performance, maintainability, and organization. By adopting this best practice, you can create faster, more efficient, and more maintainable websites.

Stylesheets Made Easy

UltimateWB built-in Styles Manager

UltimateWB comes with a built-in Styles Manager. Set background images, colors, fonts, text colors, customize menu styling, and more. No coding required, but you can add your own custom CSS to it if you’d like.

Are you ready to design & build your own website? Learn more about UltimateWB! We also offer web design packages if you would like your website designed and built for you.

Got a techy/website question? Whether it’s about UltimateWB or another website builder, web hosting, or other aspects of websites, just send in your question in the “Ask David!” form. We will email you when the answer is posted on the UltimateWB “Ask David!” section.

Posted in Ask David!, Website Design | Tagged , , , , , , , , , | Leave a comment

Web Design Fundamentals: A Beginner’s Guide

UltimateWB built-in Styles Manager
UltimateWB website builder built-in Styles Manager makes designing easy.

Introduction

Web design is the art and science of creating websites. It involves planning, creating, and maintaining websites. If you’re interested in learning web design, this guide will provide you with the fundamental concepts and tools to get started. Click on the links for more discussion on the topic.

Core Principles of Web Design

  1. User Experience (UX): The focus should be on creating a seamless and intuitive experience for users. Consider factors like navigation, layout, and readability.
  2. User Interface (UI): The visual elements of a website, including colors, typography, and imagery, should be aesthetically pleasing and consistent.
  3. Accessibility: Ensure your website is accessible to people with disabilities. Follow guidelines like WCAG (Web Content Accessibility Guidelines).
  4. Responsiveness: Design websites that adapt to different screen sizes (desktop, tablet, mobile) for optimal viewing. UltimateWB makes it easy with the built-in Responsive app.

Essential Tools and Technologies

  • HTML (Hypertext Markup Language): The building blocks of web pages. It defines the structure of content. You can actually add/edit HTML coding with the UltimateWB CMS if you want to.
  • CSS (Cascading Style Sheets): Used to style HTML elements, controlling their appearance (colors, fonts, layout). UltimateWB comes with a built-in Styles Manager that requires no coding, but you can add your own CSS coding too.
  • JavaScript: A programming language that adds interactivity to websites. It can handle dynamic content, animations, and user interactions. UltimateWB uses javascript for form input checks, photo galleries and slideshows, and many other built-in features, all working behind-the-scenes.
  • Content Management Systems (CMS): Platforms like UltimateWB simplify website creation and management. What makes UltimateWB very special is not just the vast amount of built-in features, but the flexibility and customization options offered, and on top of that, the ability to add custom coding too if you would like.
  • Design Tools: Software like Adobe Photoshop, Illustrator, or Figma are used for creating visual elements and prototypes.
  • Code Editors: Text editors like Visual Studio Code, Sublime Text, or Atom are essential for writing HTML, CSS, and JavaScript code.

Basic Web Design Concepts

  • Layout: How elements are arranged on a page. Common layouts include grid, fluid, and fixed.
  • Typography: The choice and use of fonts. Consider factors like readability, legibility, and aesthetics.
  • Color Theory: Understanding color psychology and how colors can evoke emotions and create a specific mood.
  • Hierarchy: The visual importance of elements. Use size, color, and placement to prioritize content.
  • White Space: The empty space around elements. It improves readability and visual appeal.

Best Practices

  • Keep it Simple: Avoid clutter and focus on essential elements.
  • Prioritize Content: Content is king. Make sure it’s well-written, informative, and easy to find.
  • Test Regularly: Use browser testing tools to ensure your website works across different devices and browsers.
  • Optimize for SEO: Improve your website’s visibility in search engine results by optimizing for keywords and following SEO best practices.
  • Stay Updated: Web design trends and technologies evolve rapidly. Stay informed about the latest developments.

In Summary

Web design is a rewarding field that combines creativity and technical skills. By understanding the fundamental principles, tools, and best practices, you can create engaging and effective websites.

If you’re a web designer, it doesn’t mean you have to build websites totally from scratch. But it does mean you should choose a website builder like UltimateWB that is flexible and customizable so that you can use your creative juices.

Are you ready to design & build your own website? Learn more about UltimateWB! We also offer web design packages if you would like your website designed and built for you.

Got a techy/website question? Whether it’s about UltimateWB or another website builder, web hosting, or other aspects of websites, just send in your question in the “Ask David!” form. We will email you when the answer is posted on the UltimateWB “Ask David!” section.

Posted in Website Design | Tagged , , , , , , , , , , , , , , , , , , , , , , , , , , , , , , , , , , , , , , , , , , , , , , , , | Leave a comment

Pro Web Design Tip: Avoid Overdoing Animated Sections

moving parts animation

Animation can be a powerful tool to enhance your website’s visual appeal and user engagement. When used judiciously, it can add depth, dynamism, and a sense of interactivity. However, we have been noticing excessive animation on many Squarespace websites in particular, and it can quickly become a distraction and hinder the overall user experience.

Here are some tips for using animated sections effectively:

  • Less is more: Avoid overwhelming your visitors with a barrage of animations. Use them sparingly to highlight key elements or to create a sense of transition between sections.
  • Focus on functionality: Ensure that your animations serve a purpose. They should enhance the user experience, not detract from it. For example, use animations to reveal hidden content or to guide users through a complex process.
  • Consider loading times: Excessive animations can slow down page loading times, especially on slower internet connections. Optimize your animations to ensure that they load quickly and don’t hinder the user experience.
  • Test on different devices: Ensure that your animations are compatible with different devices and screen sizes. A smooth animation on a desktop might appear choppy on a mobile device.
  • Prioritize accessibility: Make sure your animations are accessible to all users, including those with disabilities. Use alternative text for images and provide clear instructions for users who may need to disable animations.

By following these guidelines, you can effectively use animated sections to create a visually appealing and engaging website that is also user-friendly.

Are you ready to design & build your own website? Learn more about UltimateWB! We also offer web design packages if you would like your website designed and built for you.

Got a techy/website question? Whether it’s about UltimateWB or another website builder, web hosting, or other aspects of websites, just send in your question in the “Ask David!” form. We will email you when the answer is posted on the UltimateWB “Ask David!” section.

Posted in Website Design | Tagged , , , , , , , , , , , , , | Leave a comment

WordPress.org Faces Turmoil Over ACF Plugin Controversy: A Battle for Control

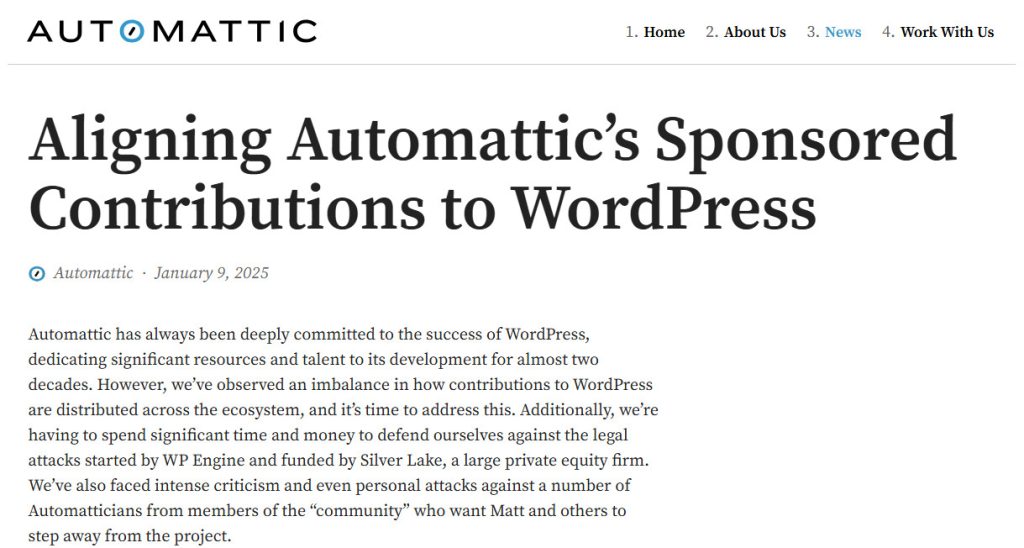
The WordPress community is in an uproar following a controversial move by Matt Mullenweg, CEO of Automattic (owner of WordPress.com) and a key figure behind WordPress.org. On October 12th, Mullenweg took an unprecedented step by forcibly replacing the popular Advanced Custom Fields (ACF) plugin and its listing on WordPress.org with a new “Secure Custom Fields” plugin. This action has sparked concerns about stability, trust, and the future of WordPress.

The ACF Controversy: What Happened?

The Advanced Custom Fields plugin, developed by the team at WP Engine, has been a staple in the WordPress ecosystem for over a decade. It allows users to easily create custom fields for posts, pages, and other content types. However, on October 12th, the official ACF plugin on WordPress.org was replaced with a new plugin called “Secure Custom Fields.” This new plugin, developed by Automattic, raised concerns within the community.

Concerns and Risks:

  • Unstable Code: The “Secure Custom Fields” plugin is untested and unapproved by the original ACF development team. This raises questions about its stability and potential compatibility issues with existing websites using ACF.
  • Loss of Trust: The forceful takeover of the ACF plugin and listing has shaken user confidence in the WordPress.org repository. Users worry about the future of other plugins and the potential for similar interventions.
  • Fragmentation: This move could lead to a situation where users have to choose between the original ACF plugin and the Automattic version, potentially creating confusion and compatibility issues.

What Users Can Do:

  • Managed Hosting Users: Users on platforms like WP Engine and Flywheel who are already using the paid version of ACF are not affected.
  • Free ACF Users (Non-Managed Hosting): Download the genuine version 6.3.8 of ACF directly from advancedcustomfields.com to avoid updates with the unapproved code.
  • Users with “Secure Custom Fields”: Follow the process above to switch back to the genuine ACF version.

If you’re just using WordPress for the blog section of your website built with UltimateWB, chances are you haven’t been using the ACF plugin, so no issues there. Actually, you could cut out all the controversies and instability of WordPress from affecting your website and opt to use the UltimateWB built-in Articles app instead.

The Future of WordPress.org:

This controversy raises questions about the future of WordPress.org. The open-source nature of the platform has been thought by many as a point of strength, but this incident highlights the potential for control struggles and conflicts. It remains to be seen how Automattic will address these concerns and rebuild trust with the community.

Additional Resources:

WP Engine Security Team Email:

Hi xxx,

We are reaching out promptly and directly to inform you of Matt Mullenweg’s (CEO of Automattic and owner of WordPress.org) unprecedented and appalling actions on Oct 12th to forcibly appropriate the Advanced Custom Fields (ACF) plugin and .org listing. The potential impact of Mr. Mullenweg’s improper action is that millions of existing installations of ACF will be updated with code that is unapproved and untrusted by the experts on the ACF team at WP Engine. We want to highlight how you can immediately reduce your exposure and risk now, and ensure you are using the genuine ACF. If your website is hosted on WP Engine or Flywheel or you are an ACF PRO customer – you are not impacted and do not need to take any action. You will continue to get the latest updates, securely from the experts on the ACF team.

If you have a website that is NOT managed on WP Engine or Flywheel AND are using the free version of ACF you must perform a one-time download of the 6.3.8 version via advancedcustomfields.com in order to get genuine ACF updates and remain safe in the future. After this one-time download you will be able to safely update as usual via the WP Admin panel.

If your site has already updated to the modified “Secure Custom Fields” plugin, you can also follow the process above to get back to a genuine version of ACF, and should not experience any loss of configuration or data doing so before there is further change to the ACF code.

The WordPress community has trusted ACF for over a decade and the expert stewards of ACF will continue to support and enhance the capabilities that our users love and trust. If you have any questions our technical support team is standing by to support you. On behalf of our entire team, we are grateful for the continued opportunity to serve your customers, your business and team.

For a more in-depth overview of what has happened with the free ACF plugin and WordPress.org, you can read this post here.

The WP Engine Security team

Advanced Custom Fields Website: https://www.advancedcustomfields.com/resources/

Are you ready to design & build your own website? Learn more about UltimateWB! We also offer web design packages if you would like your website designed and built for you.

Got a techy/website question? Whether it’s about UltimateWB or another website builder, web hosting, or other aspects of websites, just send in your question in the “Ask David!” form. We will email you when the answer is posted on the UltimateWB “Ask David!” section.
Posted in Technology in the News | Tagged , , , , , , , , , , , | Leave a comment

Tutorial: Easiest Way to Integrate Your Custom Website with Printful

Printful logo

So we are reviewing at UltimateWB how to integrate with Printful, to possibly include as a built-in feature, and we are accepting feedback now on what features you would like in the integration. Here’s some info on possibilities, with the Printful API.

Integrating your custom website with Printful is a fantastic way to offer print-on-demand products to your customers without handling inventory or shipping. Printful allows you to create custom products and automatically fulfill orders on your website.

In this tutorial, we will walk you through the easiest way to integrate Printful into your custom website. The method we’ll use involves Printful’s API to connect your store and automate the process of syncing products and processing orders.

Step 1: Create a Printful Account

If you haven’t already, start by creating a Printful account:

  1. Go to Printful.
  2. Click on Sign Up and follow the instructions to create your account.

Once you’re signed up, you can access the dashboard to manage your products, orders, and integrations.

Step 2: Set Up a Custom Website

You’ll need to have your custom website already set up. If you’re building your own site, it’s likely you’re using a combination of HTML, CSS, JavaScript, and a backend technology like PHP, Python, or Node.js, along with a database like MySQL. UltimateWB website builder uses PHP and MySQL for the backend.

Ensure that your website is capable of handling product pages, shopping cart functionality, and receiving orders.

Step 3: Understand Printful API

Printful provides a REST API that allows you to manage products, sync orders, and track shipments directly from your website.

  • API Documentation: You can find the Printful API documentation on their website. This documentation includes endpoints for products, orders, and fulfillment.
  • Authentication: You’ll need an API key to interact with the Printful API. This can be found in your Printful dashboard by navigating to Settings > API. Generate an API key and store it safely.

Step 4: Connect Your Website to Printful API

To connect your website to Printful’s API, follow these steps:

a. Generate the API Key

  1. Log in to Printful.
  2. Go to Settings > API.
  3. Generate an API key.

This API key will be used to authenticate requests between your website and Printful.

b. Make API Requests

You’ll need to set up your website to interact with Printful’s API. In this example, we’ll use PHP to make requests, but the same logic applies for other languages.

Here’s a simple example using PHP to get your store’s information:

<?php
$api_key = 'YOUR_API_KEY_HERE';
$ch = curl_init();

curl_setopt($ch, CURLOPT_URL, 'https://api.printful.com/store');
curl_setopt($ch, CURLOPT_RETURNTRANSFER, 1);
curl_setopt($ch, CURLOPT_HTTPHEADER, array(
'Authorization: Bearer ' . $api_key
));

$response = curl_exec($ch);
curl_close($ch);

$store_info = json_decode($response, true);
print_r($store_info);
?>

This script sends a request to Printful’s /store endpoint and returns your store information. You can use similar requests for products, orders, and fulfillment.

c. Sync Products

To display products from Printful on your website, use the /products API endpoint.

Here’s an example of fetching your products:

$ch = curl_init();

curl_setopt($ch, CURLOPT_URL, 'https://api.printful.com/products');
curl_setopt($ch, CURLOPT_RETURNTRANSFER, 1);
curl_setopt($ch, CURLOPT_HTTPHEADER, array(
'Authorization: Bearer ' . $api_key
));

$response = curl_exec($ch);
curl_close($ch);

$products = json_decode($response, true);

// Display the products on your site
foreach ($products['result'] as $product) {
echo '<h2>' . $product['name'] . '</h2>';
echo '<img src="' . $product['thumbnail_url'] . '" alt="' . $product['name'] . '">';
echo '<p>Price: ' . $product['price'] . '</p>';
}

This will output the list of products available in your Printful store, including their names, images, and prices.

d. Process Orders

When a customer places an order on your site, you can use the Printful API to send that order for fulfillment. Here’s how to create an order programmatically using the /orders endpoint:

$order_data = array(
'recipient' => array(
'name' => 'John Doe',
'address1' => '123 Street',
'city' => 'Los Angeles',
'state_code' => 'CA',
'country_code' => 'US',
'zip' => '90001'
),
'items' => array(
array(
'variant_id' => 4011, // Get this ID from Printful product catalog
'quantity' => 1
)
)
);

$ch = curl_init();

curl_setopt($ch, CURLOPT_URL, 'https://api.printful.com/orders');
curl_setopt($ch, CURLOPT_RETURNTRANSFER, 1);
curl_setopt($ch, CURLOPT_POST, 1);
curl_setopt($ch, CURLOPT_POSTFIELDS, json_encode($order_data));
curl_setopt($ch, CURLOPT_HTTPHEADER, array(
'Authorization: Bearer ' . $api_key,
'Content-Type: application/json'
));

$response = curl_exec($ch);
curl_close($ch);

$order_response = json_decode($response, true);
print_r($order_response);

This will send an order to Printful for fulfillment. You will need to replace the recipient details and variant_id with dynamic data from your website’s checkout form.

Step 5: Handle Webhooks for Order Status

To keep your customers informed about their order status, you can use Printful’s Webhooks feature. Webhooks allow Printful to send real-time updates (e.g., order fulfilled, shipped) to your website.

  1. Set up a webhook URL on your website to receive notifications from Printful.
  2. Register the Webhook in Printful’s API by sending a request to the /webhooks endpoint.

Example of registering a webhook:

$webhook_data = array(
'url' => 'https://yourwebsite.com/printful-webhook',
'types' => array('package_shipped', 'order_fulfilled')
);

$ch = curl_init();

curl_setopt($ch, CURLOPT_URL, 'https://api.printful.com/webhooks');
curl_setopt($ch, CURLOPT_RETURNTRANSFER, 1);
curl_setopt($ch, CURLOPT_POST, 1);
curl_setopt($ch, CURLOPT_POSTFIELDS, json_encode($webhook_data));
curl_setopt($ch, CURLOPT_HTTPHEADER, array(
'Authorization: Bearer ' . $api_key,
'Content-Type: application/json'
));

$response = curl_exec($ch);
curl_close($ch);

$webhook_response = json_decode($response, true);
print_r($webhook_response);

Now, when a Printful order is shipped or fulfilled, Printful will send updates to your webhook, which you can then display to customers.

Step 6: Test Everything

Before launching, thoroughly test the integration:

  • Test product sync: Ensure all products are displayed correctly on your website.
  • Test order processing: Place a test order to see if it’s submitted correctly to Printful.
  • Test webhooks: Verify that order updates are properly sent from Printful and processed by your website.

Step 7: Launch and Promote Your Store

Once the integration is complete and tested, you can launch your website. Promote it through social media, email marketing, and SEO to attract customers.

In Summary

Integrating Printful with your custom website is straightforward using their API. This allows you to automate the process of displaying products, submitting orders, and tracking fulfillment without manual intervention. With the right implementation, you can offer a seamless shopping experience for your customers, with all the benefits of print-on-demand fulfillment.

By following the steps in this guide, you’ll have your website up and running with Printful, ready to sell custom products and scale your business.

Want this as a built-in feature in UltimateWB? Please contact us and provide your feedback on what features and any specifics regarding setup that you would like.

Are you ready to design & build your own website? Learn more about UltimateWB! We also offer web design packages if you would like your website designed and built for you.

Got a techy/website question? Whether it’s about UltimateWB or another website builder, web hosting, or other aspects of websites, just send in your question in the “Ask David!” form. We will email you when the answer is posted on the UltimateWB “Ask David!” section.
Posted in Ask David!, Business | Tagged , , | Leave a comment

How to Integrate Live Streaming into Your Website: A Step-by-Step Guide

Live streaming has become a crucial feature for websites across industries, from entertainment and gaming to education, sports, and business. It allows real-time interaction with viewers, creates a personal connection, and enhances user engagement. Whether you’re building a website for online classes, live events, or product launches, integrating live streaming is an effective way to reach a wider audience.

In this guide, we’ll walk you through the process of integrating live streaming into your website, from choosing the right platform to setting up the technical infrastructure.

1. Why Add Live Streaming to Your Website?

Before diving into the technical details, it’s important to understand the benefits of live streaming:

  • Real-time interaction: Live streaming allows you to engage directly with your audience, answering questions and receiving feedback immediately.
  • Increased engagement: Live content generates more excitement and encourages viewers to stay longer on your site.
  • Wider audience reach: You can reach more users globally, as live streams can be broadcast to anyone with an internet connection.

2. Choose the Right Live Streaming Platform

The first step in integrating live streaming is choosing the right platform. There are multiple options available, depending on your needs:

  • Self-Hosted Live Streaming: You manage the server and infrastructure, giving you full control. This option is more complex but ideal for websites needing high scalability and customization. Please note that while this feature is not built-in UltimateWB, you can extend your website for this with custom coding.
  • Third-Party Platforms: Services like YouTube Live, Twitch, and Vimeo provide live streaming capabilities that can be easily embedded into your website. These platforms take care of the hosting, bandwidth, and performance, which simplifies the process. UltimateWB makes it easy to paste/integrate the embed code they provide into your website.
  • API-Based Platforms: Services like Agora, Wowza, and Daily.co offer APIs and SDKs that allow you to build custom live streaming functionality directly into your website.

For simplicity, third-party platforms or API-based solutions are often preferred because they offload much of the technical complexity.

3. Set Up the Technical Infrastructure

Once you’ve chosen the platform, you need to integrate it into your website. Here’s how to do it:

a. Embed Live Streaming Using Third-Party Platforms (YouTube, Twitch)

If you’re using a platform like YouTube Live or Twitch, the process of embedding live streams is straightforward:

  1. Create a live stream on the platform (e.g., YouTube Studio for YouTube Live).
  2. Get the embed code for the live stream:
    • On YouTube, go to your video’s share options and select “Embed.”
    • Copy the HTML embed code.
  3. Add the embed code to your website:
    • Open the HTML editor of your website.
    • Paste the embed code where you want the live stream to appear.
    • Customize the embed settings, such as the width, height, or autoplay features.

Example:

<iframe width="560" height="315" src="https://www.youtube.com/embed/live_stream?channel=YOUR_CHANNEL_ID" frameborder="0" allowfullscreen></iframe>

With UltimateWB website builder, you can create an Ad(d) and paste this code in it. Then copy/paste the generated Placeholder Text onto the webpage where you want it. With this setup, next time you have a new live stream, you can just update the Ad(d) and it will automatically update to your webpage.

b. Integrating Live Streaming Using API-Based Platforms

For more customized live streaming, API-based solutions like Agora, Wowza, or Daily.co allow you to embed live streaming features with more control and scalability.

  1. Sign up for an account on the API-based platform (e.g., Agora, Wowza).
  2. Generate an API Key or Token from the platform’s dashboard.
  3. Install the SDK:
    • For Agora, you can use their Web SDK to integrate live video streaming. Install the SDK using a package manager like npm: npm install agora-rtc-sdk
  4. Initialize the Live Stream:
    • Use the platform’s API to create a live video session. For example, with Agora: const client = AgoraRTC.createClient({ mode: "live", codec: "vp8" }); client.init("YOUR_API_KEY", function () { console.log("AgoraRTC client initialized"); });
  5. Add Video Stream to Your Webpage:
    • You can now embed the live stream directly on your webpage by attaching the video stream to a specific HTML element: <div id="liveStream"></div>
    • Use JavaScript to render the live video in this element: client.join(null, "test-channel", null, (uid) => { const localStream = AgoraRTC.createStream({ video: true, audio: true }); localStream.init(() => { localStream.play("liveStream"); client.publish(localStream); }); });

Another option is to just use Agora Web Components – you can integrate live streaming with a few lines of code, direct from the Agora website:

<body>
    <script src="agora-uikit.js"></script>
    <agora-react-web-uikit
        style="width: 100%; height: 100vh; display: flex;"
        appId='<YourAgoraAppIDHere>'
        channel='test'
    />
</body>

Just import the web component script. You can then use the web component by passing in your Agora App ID and channel name as attributes. You can customize the UIKit to enable active-speaker detection, change layouts, join as the audience, etc. using these attributes. Read more in Agora’s detailed blog.

c. Self-Hosting Your Own Live Streaming

If you want full control over your live streaming, you’ll need to set up your own server, use media server software like Wowza Streaming Engine or Nginx with RTMP module, and manage the bandwidth and performance yourself.

  1. Set up a media server: Install software like Nginx with RTMP or Wowza to handle the live stream.
  2. Configure the server: You’ll need to configure the media server to accept live streams and deliver them to viewers.
  3. Embed the live stream: Once the media server is set up, you can embed the live stream into your website by using an HTML video player (like Video.js) that can play HLS or RTMP streams: <video id="liveStream" controls> <source src="http://yourserver.com/live/stream.m3u8" type="application/x-mpegURL"> </video>

4. Ensure High Performance and Low Latency

  • Choose a Content Delivery Network (CDN): If you expect a large number of viewers, using a CDN like Cloudflare or Akamai can help reduce latency and ensure smooth streaming for users across the globe.
  • Optimize Video Quality for the Web: Adjust your stream’s resolution and bitrate based on your audience’s internet speeds to avoid buffering issues.
  • Test Across Devices: Make sure your live stream works on both desktop and mobile devices, and adjust the video player or streaming settings accordingly.

5. Test and Monitor the Live Stream

Before going live, thoroughly test the live stream:

  • Ensure low latency and high video quality.
  • Check for any buffering or delay issues.
  • Test on multiple devices (mobile, tablet, desktop).
  • Monitor the live stream performance using the analytics provided by the streaming platform.

6. Promote Your Live Stream

Now that your live stream is integrated and tested, make sure to promote it:

  • Announce it through email, social media, and other marketing channels.
  • Set up reminders and notifications for users about upcoming live events.

In Summary

Integrating live streaming into your website can boost engagement and extend your reach to a global audience. Whether you choose a third-party platform for simplicity, an API-based solution for more customization, or a self-hosted setup for full control, the key is ensuring a smooth and reliable experience for your viewers. By following the steps outlined in this guide, you can set up live streaming on your website in no time!

Are you ready to design & build your own website? Learn more about UltimateWB! We also offer web design packages if you would like your website designed and built for you.

Got a techy/website question? Whether it’s about UltimateWB or another website builder, web hosting, or other aspects of websites, just send in your question in the “Ask David!” form. We will email you when the answer is posted on the UltimateWB “Ask David!” section.
Posted in Ask David! | Tagged , , , , , , , | Leave a comment

The Bootstrap vs. the Venture Capital Billion: A Tale of Two Startup Paths

The tech world is often characterized by its high-risk, high-reward nature. While many startups dream of raising millions in venture capital, others choose a more self-sufficient path known as bootstrapping. Both strategies have their advantages and disadvantages, and the ultimate success or failure of a company often depends on a combination of factors.

The Rise and Fall of VC-Backed Giants

Venture capital-backed startups often make headlines for their massive funding rounds and ambitious growth plans. However, the pressure to deliver significant returns on investment can be immense. If a company fails to meet expectations, it can face a funding crunch and be forced to shut down.

  • Theranos: Once valued at $9 billion, Theranos raised hundreds of millions of dollars on the promise of revolutionizing blood testing. However, the company was eventually exposed for fraudulent claims and faced a lawsuit from the Securities and Exchange Commission.
  • WeWork: The coworking space giant raised billions of dollars but faced scrutiny over its unconventional business practices and aggressive expansion. Ultimately, WeWork had to lay off thousands of employees and accept a significant bailout from SoftBank.
  • Zenefits: This human resources software company raised $1.5 billion but faced allegations of unethical sales practices and regulatory scrutiny. Zenefits ultimately had to lay off a significant portion of its workforce and restructure its business model.

Thriving VC-Backed Giants: Success Stories from Uber, Airbnb, and DoorDash

While the tech world is littered with examples of venture capital-backed startups that failed to live up to their hype, there are also numerous success stories that demonstrate the power of VC funding when used effectively. Here are a few examples of companies that have thrived with significant venture capital investment:

  • Uber: The ride-hailing giant has revolutionized the transportation industry and achieved massive global growth, fueled by billions of dollars in venture capital funding. Uber’s success can be attributed to its innovative business model, aggressive expansion, and strong leadership.
  • Airbnb: This online marketplace for vacation rentals has disrupted the hospitality industry and become a global brand. Airbnb’s success is a testament to the power of a disruptive business model and effective marketing.
  • DoorDash: The food delivery service has experienced rapid growth and become a dominant player in its industry, thanks to substantial venture capital funding. DoorDash’s success demonstrates the power of VC funding in a consumer-facing industry.

These examples demonstrate that venture capital can be a powerful tool for driving innovation and growth. When used effectively, VC funding can provide the resources needed to scale a business, attract top talent, and compete in a highly competitive market. However, it’s important to note that success is not guaranteed, and even well-funded startups can face challenges and setbacks.

The Endurance of Bootstrapped Businesses

Bootstrapped companies, on the other hand, rely on their own funds or small amounts of debt to finance their operations. While this can limit their growth potential, it also gives them greater control over their destiny. Bootstrapped businesses are often more focused on building a sustainable business model and generating positive cash flow rather than chasing rapid growth.

  • GitHub: The popular code-hosting platform started as a small, bootstrapped operation. By focusing on building a valuable product and a strong community, GitHub eventually grew into a massive company that was acquired by Microsoft for $7.5 billion.
  • Dropbox: The cloud storage service also began as a bootstrapped company. Dropbox gained traction through its referral program and eventually raised venture capital to fuel its growth.
  • Figma: This cloud-based design tool has achieved significant success without relying on external funding. Figma’s real-time collaboration features, cross-platform compatibility, and extensive feature set have made it a popular choice among designers.
  • Automattic: The company behind WordPress.com is another example of a bootstrapped success story. Automattic has built a thriving business by focusing on building a strong community around their products.

The Key Differences

  • Funding: VC-backed companies have access to significant amounts of capital, while bootstrapped companies rely on their own funds or small amounts of debt.
  • Growth: VC-backed companies often prioritize rapid growth, while bootstrapped companies may focus on building a sustainable business model and generating positive cash flow.
  • Risk: VC-backed companies face greater pressure to deliver significant returns on investment, while bootstrapped companies have more control over their destiny.

While both strategies can lead to success, the choice between bootstrapping and venture capital ultimately depends on the company’s goals, industry, and founders’ preferences. Bootstrapping can offer greater control and flexibility, while venture capital can provide the resources needed for rapid growth.

Are you ready to design & build your own website? Learn more about UltimateWB! We also offer web design packages if you would like your website designed and built for you.

Got a techy/website question? Whether it’s about UltimateWB or another website builder, web hosting, or other aspects of websites, just send in your question in the “Ask David!” form. We will email you when the answer is posted on the UltimateWB “Ask David!” section.

Posted in Business | Tagged , , , , , , , , , , , , , , , , , | Leave a comment

The War on WordPress: WP Engine vs. Matt Mullenweg Heats Up (September 2024 Update)

WP Engine notice to customers
WP Engine message to customers about WordPress platform ban

The WordPress community has been rocked by a dramatic public feud between WP Engine, a leading managed WordPress hosting provider, and Matt Mullenweg, the co-founder of WordPress.org. This isn’t your typical software spat – it’s a full-blown battle with accusations, legal threats, and potential consequences for millions of website owners. Let’s unpack the events that unfolded in September 2024:

Seeds of Discord (Early September):

The tension began simmering when Matt Mullenweg, in his keynote at WordCamp U.S., publicly criticized WP Engine. He accused them of profiting from WordPress without contributing significantly back to the open-source project. He further criticized their practice of disabling features by default, like revision history, claiming it prioritized cost-efficiency over user experience. The harsh words, including calling WP Engine a “cancer to WordPress,” sent shockwaves through the community.

Escalation and Accusations (September 12th – 20th, 2024):

Mullenweg followed up his speech with a blog post on WordPress.org news titled “WP Engine is not WordPress.” In the post, he used the analogy of his mother confusing the two brands to highlight the distinction between the open-source software and the commercial hosting service. Perpetuating stereotypes about women and their understanding of technology. He also pointed out WP Engine’s practice of disabling revision history by default, arguing it undermined a core WordPress function. This raised questions about WP Engine’s commitment to the core WordPress experience.

Escalation and Retaliation (September 23rd):

WP Engine responded with a blog post titled “Is Your Mom Confused? Why WP Engine and WordPress are Different.” This lighter approach aimed to defuse the situation. However, on the same day, WP Engine sent a cease-and-desist letter to Automattic (the company behind WordPress.com) demanding Mullenweg retract his comments.

Legal Ping-Pong (September 25th):

The situation took a drastic turn when Automattic retaliated with a cease-and-desist letter of their own, accusing WP Engine of trademark infringement for its use of the term “WP Engine.” This was a bold move by WP Engine, considering how ingrained the term is within the WordPress ecosystem.

Banning the Prodigal Son (September 25th):

The most significant blow came later on September 25th. WordPress.org announced that it was banning WP Engine from accessing its resources. This meant WP Engine customers would no longer be able to directly update or install plugins and themes through the official WordPress repository, a critical security and functionality feature.

Uncertain Future:

The situation remains unresolved as of September 29th, 2024. WP Engine users are scrambling for solutions to keep their websites secure and updated, while the broader WordPress community grapples with the implications of this internal conflict.

What are the Key Issues?

This fight transcends personal animosity. Here are the underlying issues:

  • Open Source vs. Commercialization: Matt Mullenweg champions the open-source nature of WordPress and encourages companies like WP Engine to contribute more to the project’s development, even though they are free to use and commercialize WordPress without restrictions.
  • Contribution vs. Profit: WP Engine argues they contribute in different ways, like fostering innovation and providing top-tier hosting services.
  • Branding and Confusion: The similar names “WP Engine” and “WordPress” can mislead users, potentially hindering Automattic’s ability to monetize WordPress.com.

What Does This Mean for You?

If you use WP Engine for your WordPress site, you might face challenges updating plugins and themes. Consider exploring alternative solutions or contacting WP Engine for updates. This situation also underlines the importance of staying informed and having backup plans for your website.

The Alternative of Keeping WordPress just for the Blog section of your website, if any

And of course there is the awesome option of migrating to UltimateWB! You don’t have to worry so much about third party plugins with UltimateWB like you do with WordPress – some have installed over 50 plugins on their WordPress website to get the features you need, when it’s all built-in with UltimateWB. It is so much easier to design, build, manage, and keep your website secure with UltimateWB.

And you can still have an integrated blog with WordPress if you’d like, the easy way with UltimateWB. When you update your website design through the UltimateWB built-in Styles Manager or your Header or Footer through the UltimateWB CMS, your built-in WordPress blog can get automatically updated too. You don’t need a SEO plugin for your WordPress either – UltimateWB has included the ability to customize meta descriptions on a per post basis. Regarding your WordPress platform updates, it would just be about updating the platform itself, not plugins or themes.

Looking Ahead:

The future of this feud remains uncertain. Can they find common ground? Will a legal battle ensue? One thing is clear: the WordPress community is watching closely, and the outcome will have a significant impact on the future of WordPress itself.

Confusing names in WordPress is actually not something new, with wordpress.org and wordpress.com: What is the difference between wordpress.com and wordpress.org? Does wordpress.com own WordPress?

Related links: UltimateWB vs. Webflow, WordPress, and Wix: Making the Right Choice for Your Website

Website Builder Showdown: Wix vs. WordPress vs. UltimateWB – Finding the Ultimate Winner!

WordPress blog vs UltimateWB Articles App – Diary vs Online Magazine

What are the most common WordPress vulnerabilities?

Navigating Compatibility Issues with WordPress Plugins: The Impact of Block vs. Non-Block Themes

Choosing the Best Website Solution: WordPress, Wix, Squarespace, and UltimateWB Compared

Open Source vs. UltimateWB: Making the Right Choice for Your Website Builder

The Drawbacks of Using a WordPress Page Builder and Why UltimateWB Is a Better Option

Why do WordPress websites and blogs get hacked so much?

WordPress website hacked? How to fix it…!

What do I do if someone hacked my WordPress e-commerce site?

Transitioning from a Hacked WordPress Site to UltimateWB: A Seamless Rebuild

Are you ready to design & build your own website? Learn more about UltimateWB! We also offer web design packages if you would like your website designed and built for you.

Got a techy/website question? Whether it’s about UltimateWB or another website builder, web hosting, or other aspects of websites, just send in your question in the “Ask David!” form. We will email you when the answer is posted on the UltimateWB “Ask David!” section.

Posted in Technology in the News, Website Builder Software Comparison | Tagged , , , , , , , , , , , , , , , , , , , | Leave a comment